I've seen too many DIY enthusiasts waste time and money on wall putty jobs that crack, peel, or bubble within weeks. The problem isn't your skills—it's following the wrong application process for different surfaces.
To apply wall putty1 on concrete or painted surfaces, first clean, sand, and repair cracks on dry, dust-free walls. Mix putty with water until smooth and lump-free. Apply thin, even coats using a putty knife, allowing 6-24 hours drying time between layers. Sand lightly between coats and after the final application.

After years of working with both professional contractors and homeowners, I've learned that success with wall putty isn't about how you apply it—it's about how you prepare the surface and sand between coats. Let me show you the exact steps that make the difference between a smooth, lasting finish and a cracking, peeling mess.
How Should You Prepare Different Surfaces Before Applying Wall Putty?
Many homeowners rush into applying putty without proper preparation. When the finish cracks or bubbles later, they blame the putty quality when the real culprit is inadequate surface prep.
Surface preparation differs significantly between concrete and painted walls. For concrete, remove dust, dampen slightly, and repair cracks. For painted surfaces, sand to create texture, remove loose paint, clean thoroughly, and fill holes. Both surfaces must be completely dry and dust-free before putty application.

The Critical Differences Between Concrete and Painted Wall Preparation
I always tell my clients that 70% of a successful putty application depends on proper preparation. For concrete walls2, the main challenge is managing porosity. Concrete surfaces are highly absorbent and can quickly suck moisture from putty, causing it to dry too fast and crack.
Before applying putty to concrete:
- Thoroughly clean the wall to remove dust, grease, and loose particles
- Lightly spray the wall with water (not soaking wet, just damp)
- Apply a primer sealer designed for concrete to regulate absorption
- Allow primer to dry completely (usually 4-6 hours)
For painted walls, the challenge is adhesion. I've seen many cases where beautifully applied putty simply peels off in sheets because the surface was too smooth.
Before applying putty to painted walls:
- Sand the entire surface with 120-grit sandpaper to create a rough texture
- Remove all loose or flaking paint completely
- Clean the surface with a mild detergent solution
- Allow to dry for at least 24 hours
- Apply a bonding primer specifically designed for painted surfaces
| Surface Type | Key Preparation Steps | Common Mistakes |
|---|---|---|
| Concrete | Clean, dampen, prime | Applying putty on dusty surface |
| Painted | Sand, clean, prime | Skipping sanding, inadequate cleaning |
What's The Right Way To Mix Wall Putty For Different Surfaces?
I've watched contractors struggle with putty that's too thick, causing drag marks, or too thin, resulting in shrinkage cracks. Mixing seems simple but makes a huge difference in your results.
For proper wall putty mixing, add water gradually to powder until achieving a smooth paste with yogurt-like consistency. For concrete walls, mix slightly thinner to aid penetration. For painted surfaces, maintain a thicker consistency for better adhesion. Always mix small batches and stir continuously to avoid lumps.

Finding The Perfect Putty Consistency
Getting the right putty consistency isn't just about following package instructions—it's about understanding how your specific wall will interact with the mixture. I've found that the ideal approach differs based on both surface type and climate conditions.
For concrete walls, especially in drier climates, I mix my putty slightly thinner than recommended—about 10% more water than the standard ratio. This helps the first coat penetrate microcracks in the concrete and create a stronger bond. However, for second and subsequent coats, I return to the standard consistency to build thickness without sagging.
For painted surfaces, especially glossy ones, a slightly thicker mix helps the putty adhere better. I reduce water by about 5-8% from the recommended amount. This thicker consistency also helps when covering transition areas between intact paint and exposed wall.
Mixing techniques matter too. I always add powder to water (not water to powder) and use a drill mixer at low speed. This prevents the lumps that can ruin your finish. And I never mix more than I can use within 30 minutes, as putty begins to set and becomes difficult to work with.
Temperature affects consistency too:
- In hot weather: Mix slightly thinner and work in smaller batches
- In cold weather: Mix standard consistency but work slower as drying times increase
| Climate Condition | Concrete Wall Mix | Painted Wall Mix |
|---|---|---|
| Hot & Dry (>30°C) | Add 15% more water | Standard mix |
| Moderate (20-30°C) | Add 10% more water | Reduce water by 5% |
| Cool (<20°C) | Standard mix | Reduce water by 8% |
How To Apply Wall Putty Correctly On Different Surfaces?
Many DIYers struggle with putty application, creating uneven surfaces that require excessive sanding. The secret lies in technique rather than strength or speed.
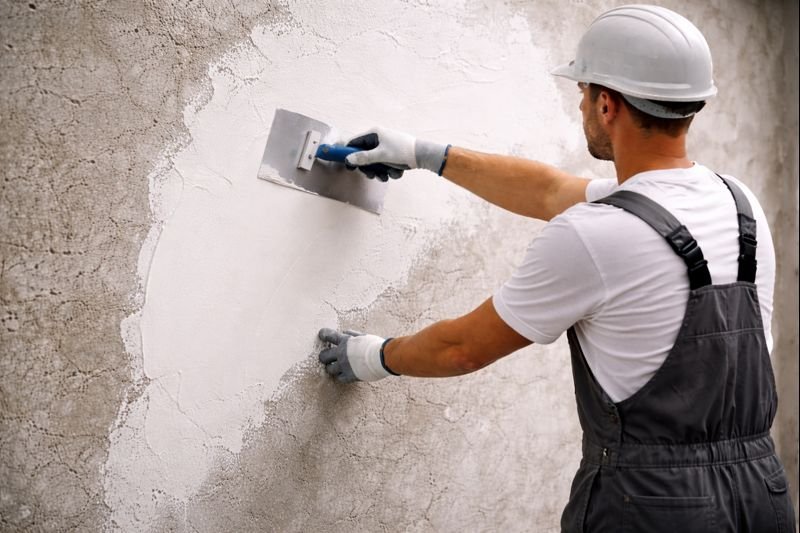
Apply wall putty using a wide putty knife in thin, even coats (1-2mm thick). Work in small sections of 3-4 square feet, using upward strokes for concrete and side-to-side motions for painted surfaces. Allow each layer to dry completely before applying the next coat or sanding.

Mastering The Putty Knife Technique
The application process is where most people go wrong. They either apply too much pressure, creating thin spots, or too little pressure, leaving excess putty that cracks as it dries. I've developed a steady-pressure technique that works consistently.
For concrete walls:
- Hold the putty knife at a 45° angle to the wall
- Apply moderate, consistent pressure
- Use upward strokes to help fill pores and small imperfections
- Work in sections no larger than 3-4 square feet at a time
- Apply thin coats (1-2mm maximum thickness)
- Allow each coat to dry completely (6-24 hours depending on weather)
- Sand lightly between coats with 220-grit sandpaper
- Apply 2-3 coats for best results
For painted surfaces:
- Hold the putty knife at a 30° angle (slightly flatter than for concrete)
- Use side-to-side strokes rather than upward ones
- Focus on maintaining consistent thickness
- Pay extra attention to transitions between old paint and bare wall
- Allow more drying time (painted surfaces don't absorb moisture as readily)
- Sand between coats with finer 320-grit sandpaper
I've found that using two putty knives—one for scooping and one for applying—helps maintain consistent application. The application knife stays cleaner, resulting in smoother finishes with fewer drag marks.
Timing between coats is crucial too. Rushing to apply a second coat before the first is completely dry will trap moisture, leading to bubbles or delamination later. I always verify dryness by touching the surface—it should feel completely dry and slightly cool to the touch.
What Are the Best Practices & Tips for 2026 Wall Putty Application?
The wall putty market is constantly evolving, with new products promising better results. But without understanding the fundamentals, even the best products will disappoint.
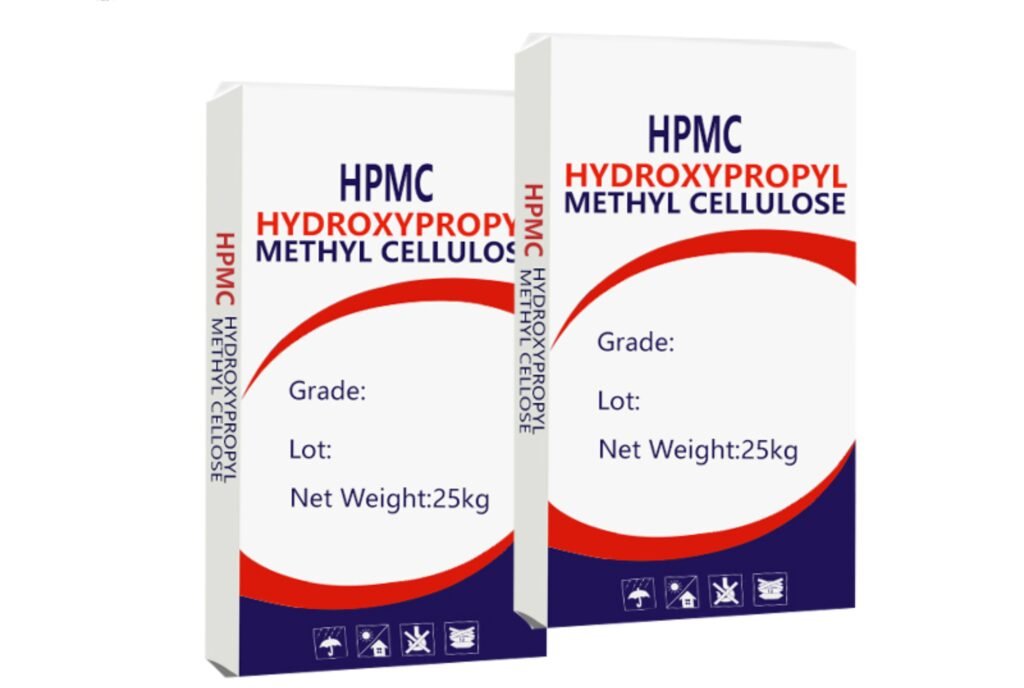
For best 2026 wall putty application, use ready-mixed acrylic putties for painted surfaces and polymer-modified putties3 for concrete. Apply with wide stainless-steel putty knives in thin layers. Use LED work lights to spot imperfections, and finish with fine-grit (400+) sanding before applying water-based primers.

Embracing Modern Putty Application Techniques
The world of wall putty1 has seen significant innovations in recent years. From my experience working with the latest materials, several new approaches are becoming standard practice for professionals.
Acrylic-based putties are now dominating the market, especially for painted surfaces. These offer better adhesion, flexibility, and moisture resistance compared to traditional calcium-based putties. For concrete surfaces, polymer-modified putties with silica additives provide superior filling of microcracks while maintaining breathability.
Tool technology has improved too. The highest-quality applications now use Japanese-style stainless steel putty knives with rounded corners that prevent edge marks. Some professionals are also adopting flexible plastic spreaders for the final coat, which leave an ultra-smooth finish requiring minimal sanding.
Lighting techniques have revolutionized quality control. I now use portable LED work lights positioned at low angles to the wall during application. This raking light immediately reveals uneven areas that would be invisible under normal lighting but would become obvious once painted. This allows for immediate correction rather than discovering problems after primer application.
Environmental considerations are also changing application methods:
- Low-VOC water-based putties now match or exceed the performance of solvent-based options
- Micro-fiber additives in premium putties reduce cracking without sacrificing sandability
- Smart-curing formulations adjust drying time based on ambient humidity
For highest-quality finishes in 2026, I recommend this advanced process:
- Apply a penetrating primer specially formulated for your surface type
- Use thin multiple coats rather than fewer thick ones
- Sand between coats with progressively finer paper (180→220→320→400)
- Apply a final "skim coat" thinned 5-10% more than base coats
- Final sand with ultra-fine 600-grit for painted finishes or 400-grit for textured finishes
What Are Common Wall Putty Mistakes?
After supervising countless wall putty projects, I've seen the same costly mistakes repeated over and over—mistakes that lead to rework, wasted materials, and frustrated customers.
Common wall putty mistakes include inadequate surface preparation, improper mixing (too thick or thin), applying excessive thickness in single coats, insufficient drying time between layers, and neglecting to sand between coats. These errors lead to cracking, bubbling, peeling, and poor final appearance.

Learning From The Most Expensive Putty Failures
The most expensive mistake I see repeatedly is rushing the process. Wall putty application simply cannot be accelerated beyond certain physical limitations. When contractors try to complete a three-coat job in one day instead of three, disaster inevitably follows.
One particularly dramatic failure I witnessed involved a hotel renovation where the contractor applied putty nearly 1cm thick in a single coat to save time. Within weeks, the entire surface developed deep cracks that revealed the original wall. The contractor had to remove everything and start over, doubling labor costs and delaying the project by weeks.
Another common failure point is moisture management. Many applicators don't realize that putty must be completely dry not just on the surface but throughout its entire thickness before applying subsequent coats or paint. I use a moisture meter when working on important projects to verify complete drying.
Sanding between coats is another critical step often skipped but vital for success. Each layer needs light sanding to:
- Remove application marks and ridges
- Create mechanical tooth for the next layer to bond properly
- Identify low spots needing additional filling
Environmental factors cause many failures too. I've seen beautiful putty work ruined by applying it:
- In direct sunlight (causing too-rapid drying and cracking)
- During high humidity (preventing proper curing)
- In temperatures below 10°C (leading to poor adhesion)
- In dusty conditions (causing contamination between layers)
The final common mistake is poor transition management between different surface types. When applying putty across areas that transition from concrete to drywall, or painted to unpainted surfaces, each area requires specific technique adjustments. Using the same approach across all surfaces creates weak points where cracks and peeling begin.
How to Apply Putty on Concrete Wall?
Concrete walls present unique challenges that require specific techniques. I've refined my approach after fixing many failed applications on concrete surfaces.
To apply putty on concrete walls, first remove dust and dampen the surface. Apply a concrete primer and let dry. Mix putty slightly thinner than normal. Apply first coat with firm pressure in upward strokes to fill pores. Wait 12-24 hours between coats, sanding lightly. Complete with 2-3 thin coats rather than one thick layer.

Mastering Concrete Wall Putty Application
Concrete's porous nature and alkalinity make it particularly challenging for putty application. My experience has shown that success on concrete requires understanding how moisture moves through this material.
Concrete retains and releases moisture differently than other surfaces, which can cause putty to crack if not addressed properly. Before applying putty to any concrete wall, I thoroughly check for signs of dampness or water seepage. Even minor moisture issues must be resolved first—typically with a waterproofing treatment—or the putty will eventually fail.
Another unique aspect of concrete is its high alkalinity, which can react with standard putty formulations. I always use an alkali-resistant primer specifically designed for concrete before applying putty. This creates a neutral barrier that prevents chemical reactions that would otherwise cause discoloration or adhesion failure.
Application technique for concrete differs subtly but importantly from other surfaces:
- Hold the putty knife at a steeper angle (closer to 60°) than for other surfaces
- Use firm, short strokes rather than long sweeping ones
- Work the putty deeply into pores and small divots
- Apply slightly thinner coats than you might on drywall or plaster
- Extend drying times by 25-50% compared to manufacturer recommendations
Concrete often has imperfections that require spot treatment. I address these in a separate step:
- Small holes (under 5mm): Fill with putty slightly thicker than normal consistency
- Medium divots (5-10mm): Apply a specialized concrete filler first, then putty over it
- Large defects (over 10mm): Use a concrete repair mortar, allow to cure fully, then apply putty
Temperature control is particularly important with concrete. I try to maintain the wall temperature between 15-25°C during application and curing. In hot weather, I sometimes mist the wall with water several hours before application to cool the surface and add ambient moisture.
Conclusion
Success with wall putty comes down to proper preparation, the right consistency, thin multiple coats, complete drying between layers, and careful sanding. Follow these steps for both concrete and painted surfaces to achieve smooth, lasting results that look professional.