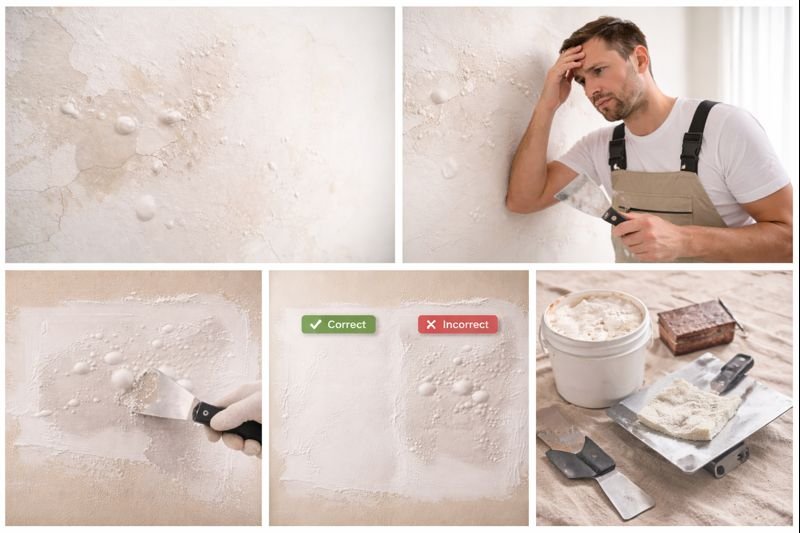
Bubbling skim coat ruins your perfect wall finish and wastes valuable time and materials. This frustrating problem plagues countless contractors in Saudi Arabia, leaving clients unhappy and project timelines extended.
Skim coat bubbles typically form when air trapped beneath the surface tries to escape through wet material. This happens because dry substrates absorb moisture too quickly, pulling water from the skim coat while simultaneously pushing air upward through the uncured surface.
 https://placehold.co/600x400 "Bubbling skim coat on drywall")
I've been supplying construction materials in Saudi Arabia for years, and bubbling skim coat1 is one of the most common complaints I hear from contractors. The good news? After working with hundreds of professionals, I've gathered their most effective solutions for this persistent problem.
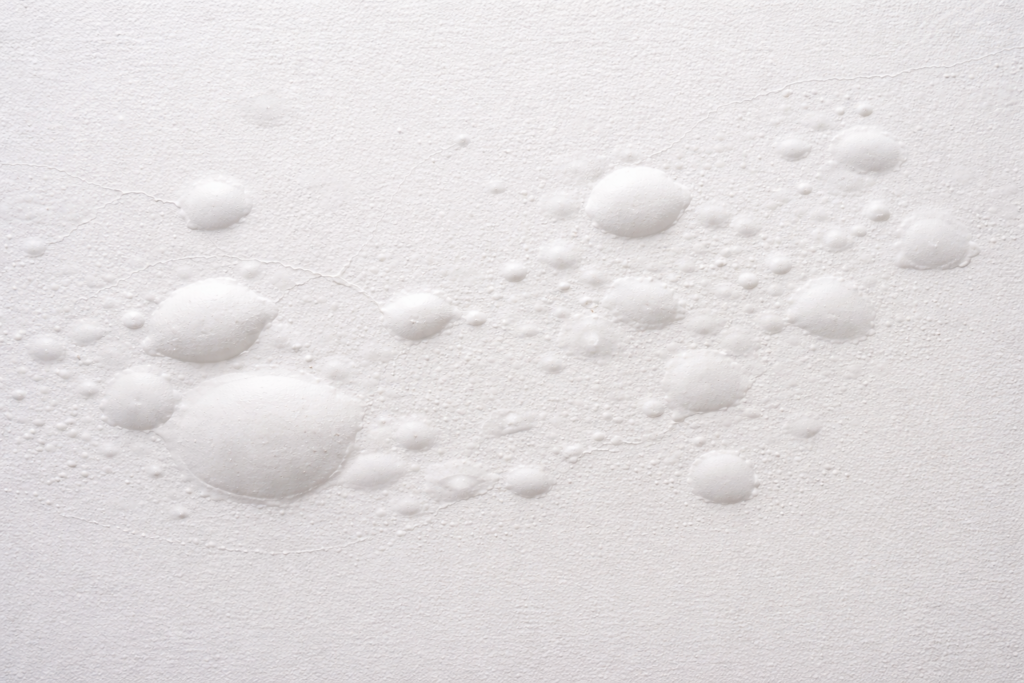
What Causes Bubbles in Skim Coat?
Every contractor faces bubbling nightmares at some point. These frustrating imperfections ruin your finish, waste materials, and force you to redo entire sections when clients notice the defects.
Skim coat bubbles form primarily due to substrate moisture problems, improper mixing techniques, applying too thick layers, high ambient temperatures, and using incompatible materials between coats. The substrate's porosity and preparation significantly influence bubble formation.

The Saudi climate creates unique challenges for skim coating applications. Think of your substrate as a giant, bone-dry sponge filled with countless microscopic pores. When you apply wet skim coat, the substrate immediately starts drawing in moisture, pushing trapped air outward through your fresh application.
The Thirsty Wall Problem
Saudi contractors face an uphill battle against extremely dry surfaces. These parched substrates can absorb moisture from skim coat at alarming rates. When this happens, the water-starved wall pulls moisture from your skim coat while simultaneously forcing air bubbles upward.
The problem gets worse under Saudi's intense sun. Surface "skinning" happens when the outer layer dries too quickly while the underlying material remains wet. This creates a sealed barrier that traps air and moisture underneath, leading to bubbles and blisters that ruin your finish.
Temperature and Timing Issues
The timing of application plays a crucial role in bubble formation. Applying skim coat during the hottest part of the day virtually guarantees surface skinning problems. I've seen contractors forced to redo entire walls because they didn't account for early morning temperature spikes affecting their freshly applied coat from the previous evening.
What is the Disadvantage of Using Skim Coats?
Skim coating promises smooth, perfect walls, but contractors often face unexpected setbacks. The time-consuming application process frequently runs into bubbling issues that require complete removal and reapplication.
The main disadvantages of skim coating include its labor-intensive application, susceptibility to environmental factors causing bubbles, high skill requirement, extended drying times between layers, and the need for proper substrate preparation, which significantly increases overall project time and cost.

While skim coating creates beautiful finishes when done correctly, the process comes with several significant challenges that Saudi contractors must navigate. I've supplied materials to projects where contractors underestimated the complexity of proper skim coating, resulting in significant delays and budget overruns.
Hidden Costs and Time Demands
The true cost of skim coating extends far beyond the materials themselves. The process requires multiple layers with adequate drying time between applications. In Saudi Arabia's climate, this creates a difficult balancing act - provide enough drying time without allowing excessive drying that causes shrinkage cracks.
Professional-grade results demand skilled labor, specialized tools, and extensive preparation. Each stage presents opportunities for bubbling and other defects to develop. Many contractors find themselves allocating 2-3 times their initial time estimates to achieve client-approved results.
Material Compatibility Concerns
Not all skim coat materials work well together or with existing surfaces. I've seen projects derailed when contractors used incompatible primer systems or failed to properly neutralize pH levels2 on new concrete substrates. These chemical incompatibilities create reaction bubbles that no amount of technique can prevent.
The material variations become particularly problematic when renovating older buildings where substrate composition may be unknown or inconsistent throughout the structure. Testing becomes essential but adds another layer of project complexity.
How to Fix Drywall Bubbles After Skim Coat?
Finding bubbles after your skim coat has dried feels like a major setback. The smooth finish you worked so hard to create now requires repair, adding unexpected delays to your project timeline.
To fix drywall bubbles3 after skim coating, first sand down the affected areas gently, then pierce larger bubbles with a utility knife, apply pressure to remove trapped air, fill with fresh compound, allow proper drying time, and finally sand smooth for refinishing.

When bubbles appear in your finished skim coat, addressing them properly prevents future problems and ensures a truly professional result. I've developed this repair protocol after consulting with dozens of Saudi Arabia's top finishing contractors.
The Proper Bubble Repair Technique
The repair process begins with proper bubble identification. Surface bubbles appear as small, raised imperfections you can feel by running your hand across the wall. Subsurface bubbles might only become visible when light hits the wall at certain angles. Each type requires slightly different handling.
For surface bubbles, start with 150-grit sandpaper to gently remove the raised area. Be careful not to sand too aggressively, as this creates depressions that require additional filling. For larger bubbles, make a small incision with a utility knife, then gently press around the bubble to release trapped air. Clean out any loose material before applying new compound.
Preventing Bubble Recurrence
Many contractors make the critical mistake of simply filling bubbled areas without addressing the underlying cause. This frequently leads to new bubbles forming in the same locations. To prevent recurrence, apply a quality sealer to the repaired area before adding new skim coat material.
For particularly problematic areas, consider using a different application technique for the repair. If you originally used a broad knife, try a trowel application for the repair area. This changed approach often helps break the cycle of recurring bubbles by changing how pressure and material are applied to the problem spot.
Why Does My Drywall Patch Keep Bubbling?
Recurring bubbles in the same drywall patch area drive contractors crazy. You've repaired it multiple times, yet bubbles mysteriously reappear, delaying project completion and frustrating clients.
Drywall patches keep bubbling because of persistent moisture problems in the substrate, improper sealing of the original damage, air pockets trapped during application, or chemical reactions between incompatible materials used in previous repairs.

When a patch area continues to develop bubbles despite multiple repair attempts, you're likely facing a deeper issue that surface treatments alone won't solve. Through extensive testing with our Saudi customers, I've identified several common culprits for these persistent bubbling problems.
Underlying Moisture Issues
The most common reason for persistent bubbling is hidden moisture. In Saudi Arabia, this often comes from condensation inside walls (especially in air-conditioned buildings), minor plumbing leaks, or moisture migrating through concrete foundations. This trapped moisture creates vapor pressure that repeatedly pushes through your patching compound.
Testing is essential for proper diagnosis. Use a moisture meter to check the surrounding wall areas. Readings above 12% indicate excessive moisture that must be addressed before any further patching attempts. If readings remain high after checking for leaks, consider installing a vapor barrier behind the problematic section.
Material Compatibility Problems
Another frequent cause of recurring bubbles is chemical incompatibility between materials. This happens when:
| Previous Layer | New Layer | Potential Problem |
|---|---|---|
| Oil-based paint | Water-based patch | Hydrophobic reaction causes separation |
| High-pH concrete | Standard joint compound | Chemical reaction produces CO₂ bubbles |
| Unsealed drywall | Quick-setting compound | Uneven absorption causes air displacement |
| Silicone-containing repair | Standard skim coat | Bonding failure and air pocket formation |
The solution often requires completely removing the problematic section down to stable substrate, then rebuilding with compatible materials throughout each layer. While more time-consuming initially, this approach prevents the endless cycle of repair and failure.
Conclusion
Preventing skim coat bubbles requires understanding Saudi Arabia's unique climate challenges and properly preparing thirsty substrates before application. By controlling moisture, timing application carefully, and using compatible materials, you'll achieve the smooth, professional finish your clients expect.